Fountain Matcha Cake (มัทฉะลาวาเค้ก)

Print

เอาใจคนชอบรสเข้มๆ ของมัทฉะ กับเค้กสปัจน์มัทฉะเนื้อนุ่มเบา ตีด้วยวิธีแบบดั้งเดิม มาพร้อมกับหน้ามัทฉะในสองระดับความเข้มข้นและเนื้อสัมผัสที่แตกต่าง

ที่มา

พลพรรคนักปรุงพลัส
7 พฤศจิกายน 2564
สูตรโดย : พล ตัณฑเสถียร

ส่วนประกอบ


  • มัทฉะสปันจ์

  • ไข่ไก่180 กรัม

  • น้ำตาลทราย100 กรัม

  • แป้งเค้ก90 กรัม

  • ผงมัทฉะ8 กรัม

  • เนย12 กรัม

  • นมสด45 กรัม

  • คอร์นไซรัป12 กรัม

  • หน้ามัทฉะ

  • ผงมัทฉะ20 กรัม + สำหรับเสิร์ฟ

  • แป้งข้าวโพด12 กรัม

  • เกลือ¼ ช้อนชา

  • น้ำตาลทราย20 กรัม

  • คอร์นไซรัป40 กรัม

  • นมสด125 กรัม

  • วิปครีม125+125 กรัม

  • ไวท์ช็อกโกแลต120 กรัม

  • เจลาติน3 แผ่น

  • เนยจืด (หั่นเต๋าเล็ก)50 กรัม

วิธีทำ


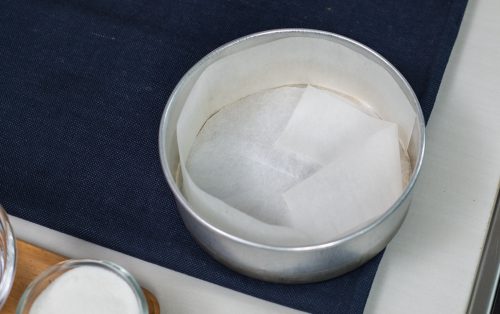
1.ตั้งเตาอบโปรแกรมไฟล่างไฟบนที่ 180 องศาเซลเซียส เตรียมพิมพ์เค้กขนาด 18 เซนติเมตร รองกระดาษที่ก้นและด้านข้าง

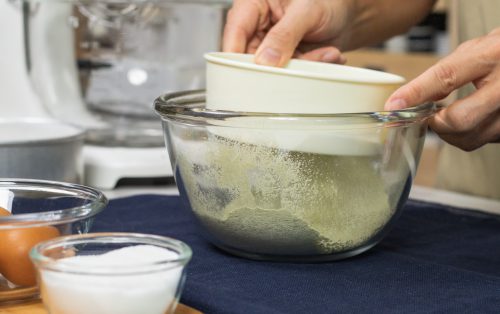
2.ผสมแป้งเค้ก และผงมัทฉะโดยตีด้วยตะกร้อมือ และร่อนอีกครั้ง เตรียมไว้

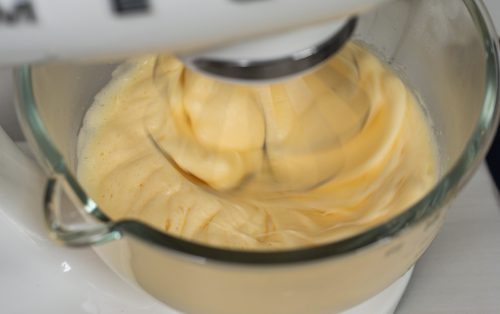
3.นำไข่ไก่ และน้ำตาลทราย ใส่ชามผสม ตีให้เข้ากันดี แล้วนำไปตั้งบนหม้อน้ำร้อน ตีให้น้ำตาลทรายละลายดี และส่วนผสมมีอุณหภูมิ 46 องศาเซลเซียส นำออกจากความร้อน นำส่วนผสมไปตีต่อด้วยหัวตีตะกร้อจนส่วนผสมมีลักษณะเบาฟู และมีสีที่ขาวขึ้น (Ribbon Stage) ประมาณ 6-10 นาที เมื่อยกตะกร้อที่ติดส่วนผสมขึ้นมา ลากเป็นเส้น ส่วนผสมจะทิ้งรอยที่ชัดเจน

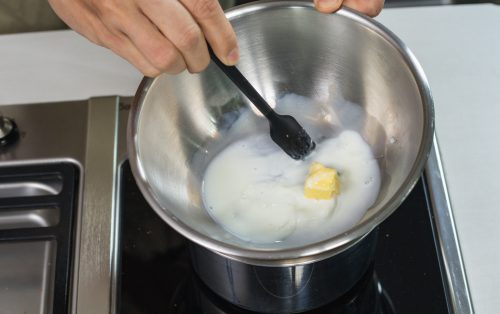
4.ในระหว่างที่ตีไข่ นำเนย นมสด และคอร์นไซรัปใส่ชามผสม ตั้งบนหม้อน้ำร้อนให้ละลายและมีลักษณะอุ่น

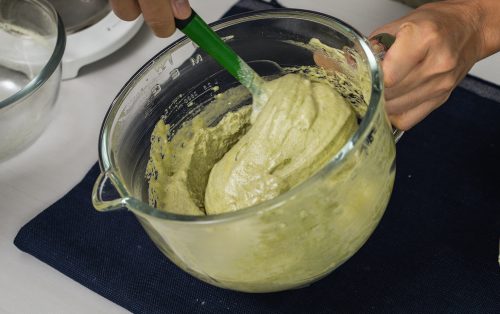
5.นำส่วนผสมแป้งและผงมัทฉะใส่ลงในส่วนผสมไข่ ตะล่อมให้เข้ากันดี ตามด้วยส่วนผสมเนย ตะล่อมต่อ

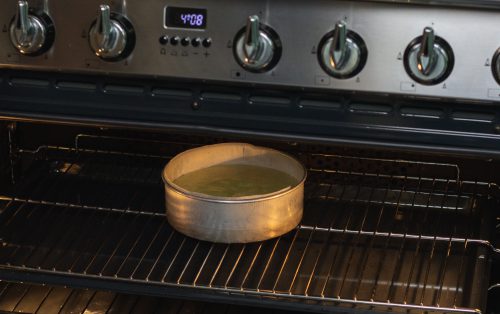
6.ถ่ายส่วนผสมใส่ลงในพิมพ์ นำเข้าอบ 22 นาที

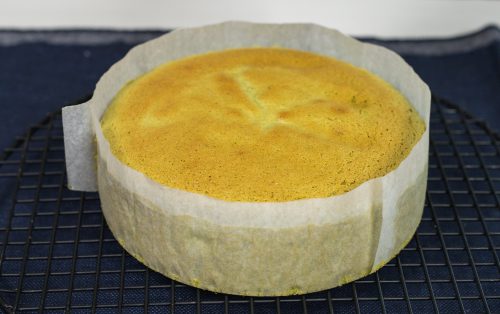
7.เมื่ออบเสร็จ คว่ำเค้กออกจากพิมพ์ลงบนตะแกรง พักให้เย็นสนิท

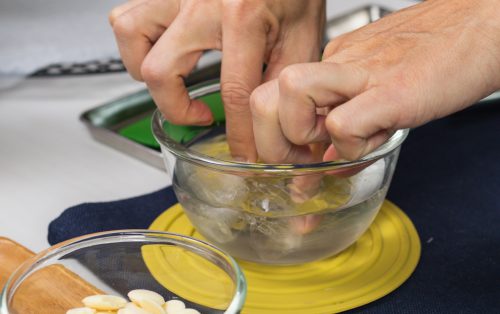
8.ทำหน้ามัทฉะลาวา โดยแช่เจลาตินในน้ำเย็นจัดให้นุ่ม และพองตัวดี ประมาณ 10 นาที

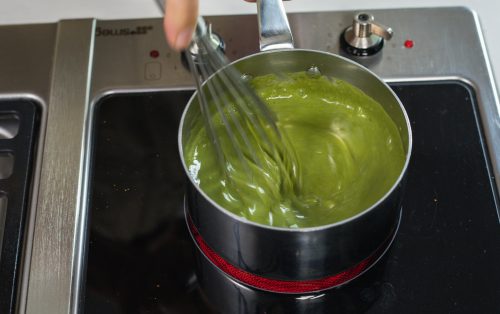
9.นำผงมัทฉะ แป้งข้าวโพด น้ำตาลทราย และเกลือ ใส่หม้อ คนให้เข้ากัน ใส่คอร์นไซรัป นมสด และ วิปครีม 125 กรัม นำไปตั้งไฟ กวนส่วนผสมให้สุกและข้นดี

10.ยกออกจากความร้อน ใส่ไวท์ช็อกโกแลต คนให้ละลายดี ใส่เจลาติน คนให้ละลาย และจึงใส่เนยที่หั่นเป็นก้อนเล็กๆ ลงไป คนต่อ พักให้เย็นลงที่อุณหภูมิห้อง

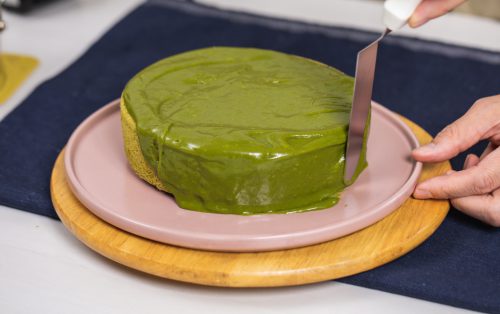
11.แบ่งออกมา 180 กรัม นำปาดให้เคลือบทั่วตัวเค้กดี

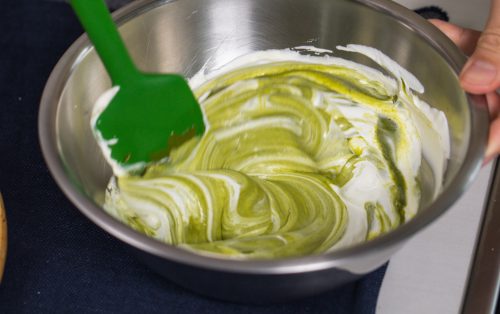
12.ตีวิปครีมส่วนที่เหลือให้ตั้งยอดอ่อน นำไปตะล่อมกับหน้ามัทฉะส่วนที่เหลือ

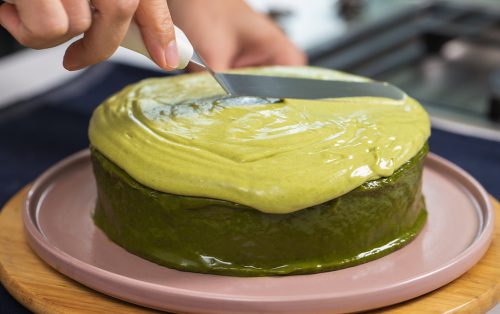
13.ราดหน้ามัทฉะครีมด้านบนเค้กให้ทั่วดี และเยิ้มมาด้านข้างเล็กน้อย แช่เย็น 20 นาที


แสดงความคิดเห็น


Leave a Reply

Print

Bold matcha flavour in a light sponge cake, topped with two layers of matcha cream for an intense green tea experience.

Source

Pholfoodmafia+
7 November 2021
Recipe by Phol Tantasathien

Ingredients


  • Matcha Sponge Cake

  • Egg180 g

  • Sugar100 g

  • Cake Flour90 g

  • Matcha Powder8 g

  • Butter12 g

  • Milk 45 g

  • Corn Syrup 12 g

  • Matcha Cream

  • Matcha Powder20 g + for serving

  • Corn Starch 12 g

  • Salt ¼ tsp

  • Sugar20 g

  • Corn Syrup 40 g

  • Milk 125 g

  • Cream 125 + 125 g

  • White Chocolate120 g

  • Gelatin 3 sheets

  • Butter (diced)50 g

How to cook


1.Preheat conventional oven to 180°C. Line bottom and side of an 18cm cake tin with baking paper.

2.Mix cake flour and matcha powder and sift to combine.

3.Mix egg and sugar with mixing bowl. Set the bowl on a water bath and stir over low heat until the mixture reached 46°C. Remove from the heat and beat with whisk attachment until pale and light, (ribbon stage), about six to ten minutes. The mixture should leave a mark on the surface once the whisk is lifted.

4.Mix egg, milk, corn syrup in a heatproof bowl. Place bowl over water bath and warm gently.

5.Add flour mix into the egg and fold to combine. Add butter mixture and fold again.

6.Add mixture into the mold and bake for twenty-two minutes.

7.Once baked, flip cake onto the rack and leave to completely cool.

8.Soak gelatin in cold water, about ten minutes.

9.Add matcha powder, corn starch, sugar, and salt in a pot. Stir to combined. Add corn syrup, milk, and 125 g of cream. Stir over medium heat until thickened.

10.Remove from the heat, add white chocolate then stir to combined. Add gelatin and fold to combined. Add cubed butter ad stir to combined as well.

11.Use 180 g of mixture to cover the cake entirely.

12.Beat cream until soft peaked, fold with the remaining matcha cream.

13.Pour the matcha cream over, to blanket the whole cake. Chill for twenty minutes before serve.


แสดงความคิดเห็น


Leave a Reply